Undervolting/Underclocking an Athlon XP for energy savings

Over the last few years I’ve set up a few MythTV systems and in general these systems tend to stay switched on 24/7 all year long. This comes to be a problem when you consider the cost of electricity these days. The obvious solution is to make the MythTV backend server use less energy.

Speculatively, I’ve been looking at an old AMD Athlon 2500 XP Barton which I’ve had knocking around here for who knows how long. The system was well specced as a desktop in it’s day with an Abit NF-7 (non SATA) motherboard, 1 gigabyte of OCZ PC3200 RAM, a DVD/RW, a Seagate Barracuda and a GeForce 6800 AGP with 128MB RAM.

The power supply was a high-end (at the time) Antec True-control 550.
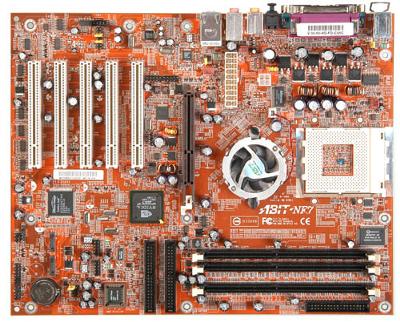
Abit NF7 motherboard

Abit NF7 motherboard

Just briefly going off my own topic: The NF7 had/has a minor ‘overheating’ problem. In the middle of the CPU socket, there is a temperature sensor. If it does not make physical contact with the underside of the CPU die, the BIOS thinks the CPU is overheating and shuts the machine down. The simple remedy is to carefully bend the sensor upwards until it stands just fractionally proud of the socket, thus ensuring good thermal contact when the processor is installed.

Also present due to past presentation were a Pinnacle TV encoder card and a PCI Firewire card.

To kick off the experiment, the BIOS settings were set to their defaults which saw the system drawing about 138 watts idle and 150 watts under load (not taxing the video card). I used burnK7 from the package ‘cpuburn‘ to apply a load to the processor. Cpuburn is also available for Windows. I metered the current drawn using my handy digital plug-in meter (Kill-a-watt style device)

Initial BIOS config giving 138 Watts idle / 150 Watts load

  • External Clock       166Mhz
  • CPU multiplier       x11
  • FSB                             333Mhz
  • CPU Core volts      1.65v
  • RAM volts               2.6v
  • Chipset volts          1.6v

Not one to mess around, I quickly worked out the lowest speed I could run the CPU at on the principal that lower clock speeds would draw less power and also allow me to run lower voltages. My Barton core was a non-mobile post week-40 chip so it was hard-locked at 11x multiplier. Therefore I had just the FSB to play with. Happily, reducing the FSB to just 100Mhz gave a CPU speed of 1100Mhz.

I then hunted around for the lowest stable voltages for each of the CPU core, Northbridge and RAM power options.

As it happens, the RAM is specced for 2.6v and the BIOS did not offer any options for going lower than this so the RAM voltage was duly ignored. Next up, the Northbridge power allowed settings down to 1.4v and that is where it went. The CPU took a little more figuring out and thus far, it has been stable at 1.15 volts. A significant drop from the stock 1.65 volts.

This configuration gave an impressive power consumption reduction; about 80W at idle and 90-95W under full load (excluding graphics load)

BIOS config giving 80 Watts idle / 95 Watts load

  • External Clock       100Mhz
  • CPU multiplier       x11
  • FSB                             200Mhz
  • CPU Core volts      1.15v
  • RAM volts               2.6v
  • Chipset volts          1.4v

Still, there was quite a bit plugged into the system itself so I went hunting for more power savings. I couldn’t ignore the fact that there was a hulking great Nvidia Geforce 6800 in the AGP slot, presumably taking up lots of power. There was also an old encoder card and the firewire card in there.

I managed to root out an old PCI ATI Rage Pro card with a stonking 8Mb of video ram so out came the Geforce and in went the card from the ark. The encoder card, firewire card and DVD/RW drive came out too and the system was rebooted. In it’s new, leaner configuration, I was pulling about 20 Watts less, 64 Watts at idle and 75 Watts under full load.
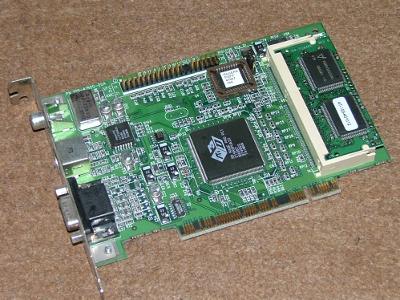
Ati Rage Pro - Note the memory module taking it from 4Mb version to 8Mb!

Ati Rage Pro - Note the memory module taking it from 4Mb version to 8Mb!

By this point, I was already using lm_sensors to monitor the system temperatures and voltages. I was pleased to see that, when idling, the CPU temperature was a trivial 28’C and even under full-load this was only rising to 33’C 🙂 A note here: The cpu was fitted with a huge slab of copper and aluminium pretending to be a heatsink with a noisy (at 3000RPM) or ear-splitting (at 5000RPM) fan.

A quick tip: To see the output of the ‘sensors’ tool in real-time, use the ‘watch’ command ie: watch sensors

Being a bit of an adventurer, I decided to disconnect the case fan and the cpu fan and boot the system to see if it fried.
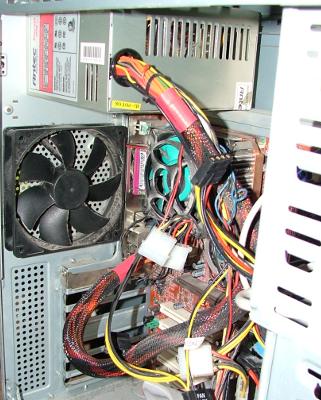
Inside the box showing the cooling arrangements (or lack thereof)

Inside the box showing the cooling arrangements (or lack thereof) Note the big copper slab and attached prongs over the CPU socket 😉

Happily, it didn’t fry. In fact, the idle temperature only rose to 38’C with passive cooling. There was still a bit of airflow afforded by the power-supply fan. However, running cpuburn for 20 minutes or so saw the temperature rise to over 65’C which I considered was pushing it a bit. I think that the CPU would be fine with one of those slim/low noise 80mm fans attached in place of the high-speed monster which it currently wears.

Checking the power meter, I now had just 58 watts idle / 70 watts under load. Interesting that the fan wanted so much current but like I say, it’s hardly an ordinary fan.

I also made a quick experiment in putting the hard drive into ‘suspend’ mode using hdparm -y /dev/hda1 this produced a further 4 Watt drop in current draw 🙂
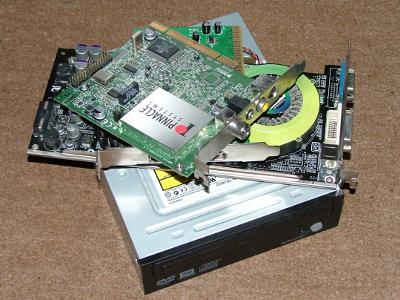
Bits removed to save energy, DVD/RW, GeForce 6800, Firewire and TV cards

Bits removed to save energy, DVD/RW, GeForce 6800, Firewire and TV cards

Of course, it wouldn’t be much use as a MythTV backend server without any encoder cards so there would be three going into the PCI slots. I’ve previously tested some Hauppauge WinTV Nova-T cards and they seem to draw about 9 Watts each in almost all conditions. With three cards in and a smaller CPU fan installed, I’d expect a further 28 Watts of power draw bringing me up to about 86 Watts idle and ~96 Watts load.

Although the only DVB encoders I have to hand are Nova-Ts, I’d like to see what the current draw is on one of the Nova-T 500 twin encoders and if any savings can be made by employing one of those instead of two of the single encoder versions.

All in all, I’m quite happy with the energy saving. It actually draws less power than my old laptop although I do conceed that the laptop has an integrated display to power.

Logitech Quickcam S 5500 for Business with Ubuntu review

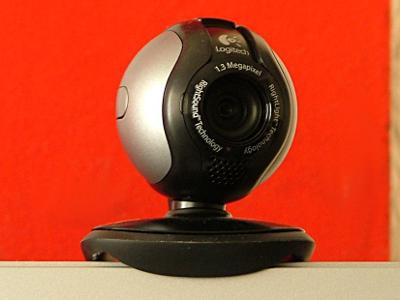
Having never tried using a webcam with Ubuntu, I recently picked up a Logitech Quickcam S 5500 – more specifically, the ‘for business’ model.

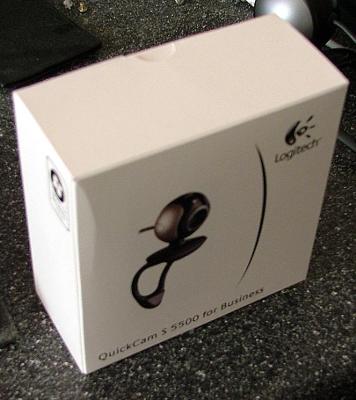
As far as I can tell, the ‘for business’ version denotes the package rather than any difference in the camera itself. The package was a minimalistically small box with the camera, a compact disk and a manual tucked inside. The exterior motif was simple, just a picture of the camera, a ‘certified for Vista’ logo and a product code panel. This is the sort of packaging that really makes sense, the box is no bigger than it needs to be and doesn’t waste materials which will ultimately be disposed of.

quickcam_s5500_for_business_box

The included software (this may be the distinction of the ‘for business’ moniker) is Logitech’s Quickcam for Enterprise on a CD. Presumably, the consumer oriented version of the S 5500 package would come with different software. Unfortunately, from the point of a review, I left the software in the box untested as I would be connecting this camera to a Ubuntu 8.10 system with which the software would be incompatible.

quickcam_s5500_1

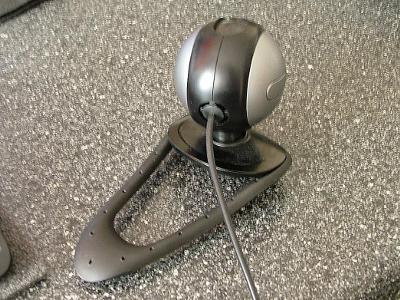
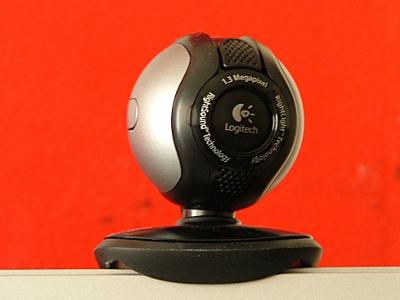
The camera itself is just a bit bigger than a golf-ball with a ‘poseable’ foot/mount and a slide-down lens cover. The sensor is a true 1.3 megapixel unit having a native resolution of 1280×1024 pixels. The USB lead which conveys both video and microphone audio from the camera is about 2 meters long and comes with a thoughful tag near the USB connector which identifies the device to make it easy to find it when unplugging it from a USB hub.

quickcam_s5500_back

Having connected the device to a Ubuntu 8.10 box, ‘lsusb’ reports:

Bus 002 Device 001: ID 1d6b:0001 Linux Foundation 1.1 root hub
Bus 001 Device 004: ID 046d:09a1 Logitech, Inc.
Bus 001 Device 001: ID 1d6b:0002 Linux Foundation 2.0 root hub

The two ‘hub’ entries are also apparently generated by the camera.

If found the camera to be working quite literally ”out of the box’ with xawtv. The camera complies with the “USB Video Class” webcam standard and is already supported by the Linux UVC drivers. Sadly, the included luvcview application which allows finer control of the cameras features wasn’t working with the S5500 so I ended up pulling the trunk sources from their git repository and building them myself. This got luvcview working and allowed manual control of the cameras exposure settings.

Logitech includes what they call “Rightlight Technology” with this camera. Put simply, the camera varies it’s exposure duration automatically depending on the available light. For instance in broad daylight, the camera will perform at 30fps. With only the light of the computer monitor on my face in a darkened room, the camera will continue to produce a good quality image at a much lower frame rate (typically 5fps). When changing the exposure manually, you are directly changing the frame rate. The sensor still captures a suprising amount of detail when deliberately set to underexpose.

The field of view is reasonably wide although not excessively so. You could confortably sit two people at a reasonable distance from the screen in front of the camera and have them in frame. The picture is generally quite sharp and well focused – the lens appears to be fixed focus – but there are some minor abberations at the edge of the image presumably caused by the size and type of lens in use. It’s still an extremely good quality image for a webcam.

Again, in the true tradition of being the most annoyingly lax reviewer ever, I neglected to test the integrated microphone which appears to sit just below the lens. The bezel touts “Rightsound Technology” so perhaps this microphone provides automatical level seeking.

There is also a button on the left side of the camera which would provide call activation/cancellation features in some Windows software but doesn’t have a default purpose on most Linux based software.

From the end user perspective, it’s ever so slightly early days for UVC cameras on Linux. Ubuntu 8.10, while supporting the Logitech S5500 has some shortcomings. For instance, Ekiga, the packaged software videophone doesn’t support UVC cameras in the shipped version. I reckon it’ll all be pretty much plug-and-play by the time Ubuntu 9.04 comes around in April though. The latest versions of Ekiga which will be packaged with Jaunty Jackelope  already supports UVC.

quickcam_s5500_2

Finally, the packaging reduced ‘for business’ version of this camera that I bought was actually a bit cheaper than the consumer counterpart.

I’m definitely recommending this product as a quality webcam. Naturally, I don’t intend to use it as a normal webcam but rather I intend to try using it as a security camera in conjunction with Zoneminder. 😉

Fujitsu Esprimo Green – Zero Watt PC?

According to an article at geek.com, Fujitsu reckon they are going to demo a PC at CeBIT 2009 which will idle/sleep at zero watts ie: no current draw whatsoever.

The article speculates that this system will still be able to interact with LAN/PAN devices while ‘asleep’. This definitely runs into ‘believe it when I see it’ territory for me. It’s not that I don’t want Fujitsu to have accomplished this; computers definitely need to draw much less power when idle, but it’s a hell of a technical mountain to climb.

The whole notion of a NIC being able to respond without power only when polled intentionally just seems ever so slightly far fetched.

If you’re going to CeBIT on 3-8 March 2009, you’ll probably be treated to a demo of just how this works. Still I hope they demonstrate the device as coupled up to a proper metering device. I wouldn’t want to think that this is all just marketing and spin 😉

How much power does a NAS use?

The other day, I took a walk into town and purchased one of these plug-in power meters. A relatively simple affair which you plug into the socket and then plug your device into. It has a digital display which, amongst other things, can display the instant Watts drawn by the connected device. This is exactly what I needed as I’ve been eager to find out how much power various devices around the home and office draw (and hence how much they cost to run 😉 )

The meter seems fairly accurate on the Watts front. I tested it with some normal filament bulbs and the reading was just a few Watts higher than their ratings as is to be expected.

I then went on to test a NAS (Network Attached Storage) device which I had recently thrown together using an old Via Epia 800 Mini-ITX motherboard, a 80GB Maxtor* hard drive, a CD-ROM drive, a USB key and a Mini-ITX specific case with a 90W ATX PSU.

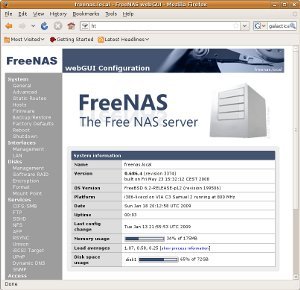
The software I used was FreeNAS 0.686.4. I used this version rather than the ‘bleeding-edge’ beta as I wanted to have the Wake-on-LAN functionality which now apparently missing on the latest version. FreeNAS boots from the CDROM and stores it’s configuration settings on the USB key. The whole lot runs headless and is configured by a lovely web interface.

FreeNAS

Now; back to the power meter 🙂

I plugged the NAS into the meter and started it up. During boot, the system was drawing 50-55Watts and settled back to about 39 Watts on completion of the boot. This would tally with a reduced load on the CPU and the CDROM having spun down. When copying files at full-speed – the network interface is 100Base-T, the power consumption reaches the high 40s.

When idling, FreeNAS tries to conserve power. Unfortunately, the Epia 800 doesn’t seem to have any frequency stepping features and presumably maintains it’s normal 800Mhz clock speed. The hard drive does spin down and this brings current draw down to about 28 Watts – not too bad considering this is one of the older Mini-ITX boards.

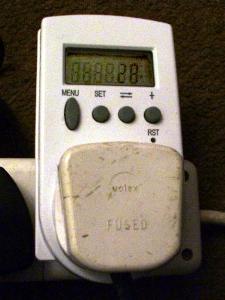
Power meter - Sorry for the manky looking plug!

Power meter - Sorry for the manky looking plug!

Shockingly, however, when switched off the system is still drawing between 3 and 5 Watts. I haven’t been able to ascertain what causes the fluctation (signalling on the NIC perhaps or a dodgey PSU?) but it’s less than ideal to have it draw so much power when it is not in use.

I think I’ll spend some time looking at other hardware options for FreeNAS, possibly booting entirely from the USB key and eliminating the 5.25in CDROM would help. Other than that, I’d probably be looking at newer Epia boards to increase the energy saving.

*Yeah, I know, I wouldn’t normally use a Maxtor either but this one was donated. 😛

Morex T3310 + Epia EX1000 + Mythbuntu

I first set up a MythTV system for my relatives a few years ago (at MythTV 0.19 IIRC) as a research system and soak-testing platform (you can’t beat free R&D testers). MythTV at the moment is great if you’ve got a technician available on call to support it but I couldn’t see myself deploying it to a customer yet. After all, MythTV at 0.21 is still billed as Alpha software and it would be rather silly to operationally deploy Alpha software 😉 The MythTV system consisted of a P4 based backend server with DVB encoder cards and a frontend machine in the lounge. Originally it ran on a SuSE based platform but this later changed to Ubuntu and then Mythbuntu based by the time 0.21 came around.

The original frontend was built on a Biostar barebones system which was styled as a ‘shuttle’ PC. Unfortunately, while not all that loud, the combination of cooling fan and disk drive sound was perhaps a bit much for quiet living-room TV watching situation. Further, being a ‘full-size’ AMD Sempron based system with a 3.5″ IDE hard drive for the operating system and Geforce 5600 video, it was a bit power-hungry by modern standards. I’d have estimated that it would be drawing around 140 Watts in operation.

To remedy the situation, I first tried to convince my relatives that watching television would only rot their brains and that they should find an alternative pastime but to no avail. Instead I had to come up with a solution to replace the Biostar box.

I decided to go with a Mini-ITX solution and sourced a B-stock Epia EX1000 from ebay. The EX1000 is a fanless Mini-ITX board from VIA with a 1Ghz C7 processor and a CX700 chipset.

Obviously, a fanless motherboard would want a fanless case to go with it and after a bit of deliberation, I sourced a Morex T3310 from Lin-ITX in the UK. The Morex T3310 is based upon the earlier Morex T3300 which did have a fan. To facilitate fanless cooling on the T3310, large vents are cut in the sides and top of the case. The integrated 60W (12v supply) PSU sits uppermost in the case so heat rising from it leaves through the top vent without causing undue heating to the motherboard below.

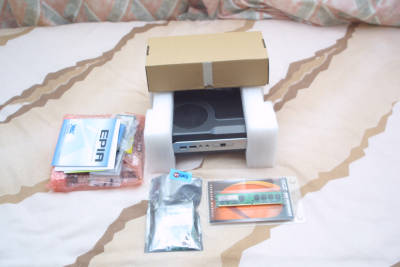
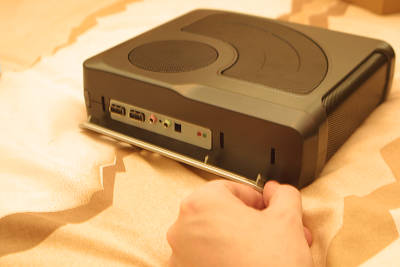
Getting the case apart to fit the motherboard is a *little* tricky so I’ve documented it here. I must apologise for the quality of the pictures, I hadn’t intended to photograph the process and used the wrong camera settings.

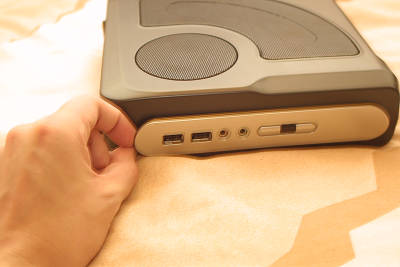
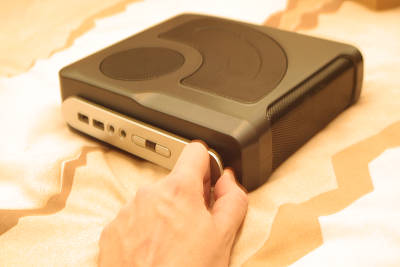
Firstly, the plastic front panel which shrouds the USB ports and power/HDD LEDs must be removed. While the plastic isn’t unusually flimsy, you’ll want to take a bit of care during removal. Use only your fingers, do not attempt to force the panel off with tools.

Lever gently at either end to release the clips.

There is a third clip in between the two outer clips and adjacent to USB ports. This should come away when the nearest out clip is released.

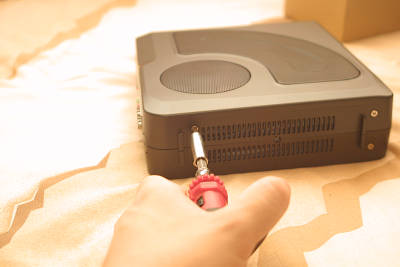
The correct side of the case must now be unscrewed. This is helpfully referred to as the ‘left’ side of the case in the Morex instructions which fail to give a reference of looking from the front or back. As it happens you can identify the correct side to remove by looking through the meshes and finding the side which has the 2.5″ HDD carrier plate nearest it.

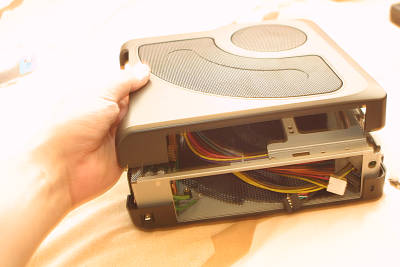
You only need to unscrew the two screws on this side. With the two screws out, you carefully pull the two sides apart from the bottom (screw end) of the case, the upper edges will then unclip from each other too.

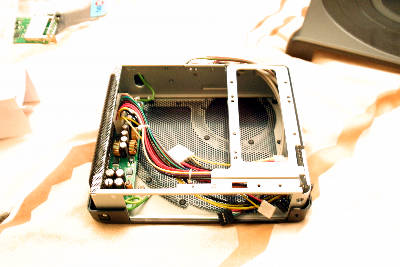
This should leave you with the case open and ready to accept your mini-itx board.

Continue reading

Brother HL 5030 (and others) drum counter reset

As much for the benefit of my own memory as for yours, I briefly detail here the drum counter reset procedure for the Brother HL 5030 laser printer (and probably most of the HL 5xxx range).

The HL 5030 has an internal counter which basically registers pages printed (apparently with weighting for cold and hot starts). This counter can be reset when replacing a drum or if you just want to run your existing drum into the ground (the HL 5030 is an older model now).

Counter Reset Procedure.

  1. Power on (Drum light should be flashing).
  2. Open the toner cartridge access door (big door on the front).
  3. Remove the toner cartridge by pulling on it.
  4. Reinsert the toner cartridge (give it a good shove).
  5. Press and hold the ‘GO’ button for about four seconds. The led indicators should come on one-by-one in amber. Once they are all on, release the ‘GO’ button.
  6. Close the toner cartridge access door.

The reset procedure is now complete.

[ad name=”articlebox10″]