I first set up a MythTV system for my relatives a few years ago (at MythTV 0.19 IIRC) as a research system and soak-testing platform (you can’t beat free R&D testers). MythTV at the moment is great if you’ve got a technician available on call to support it but I couldn’t see myself deploying it to a customer yet. After all, MythTV at 0.21 is still billed as Alpha software and it would be rather silly to operationally deploy Alpha software 😉 The MythTV system consisted of a P4 based backend server with DVB encoder cards and a frontend machine in the lounge. Originally it ran on a SuSE based platform but this later changed to Ubuntu and then Mythbuntu based by the time 0.21 came around.
The original frontend was built on a Biostar barebones system which was styled as a ‘shuttle’ PC. Unfortunately, while not all that loud, the combination of cooling fan and disk drive sound was perhaps a bit much for quiet living-room TV watching situation. Further, being a ‘full-size’ AMD Sempron based system with a 3.5″ IDE hard drive for the operating system and Geforce 5600 video, it was a bit power-hungry by modern standards. I’d have estimated that it would be drawing around 140 Watts in operation.
To remedy the situation, I first tried to convince my relatives that watching television would only rot their brains and that they should find an alternative pastime but to no avail. Instead I had to come up with a solution to replace the Biostar box.
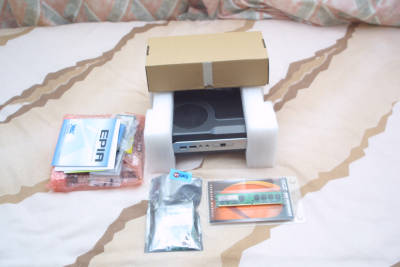
I decided to go with a Mini-ITX solution and sourced a B-stock Epia EX1000 from ebay. The EX1000 is a fanless Mini-ITX board from VIA with a 1Ghz C7 processor and a CX700 chipset.
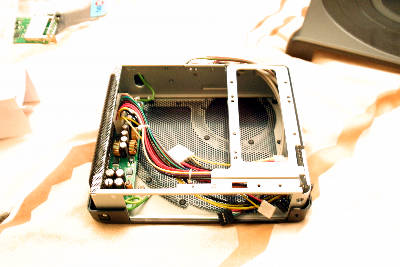
Obviously, a fanless motherboard would want a fanless case to go with it and after a bit of deliberation, I sourced a Morex T3310 from Lin-ITX in the UK. The Morex T3310 is based upon the earlier Morex T3300 which did have a fan. To facilitate fanless cooling on the T3310, large vents are cut in the sides and top of the case. The integrated 60W (12v supply) PSU sits uppermost in the case so heat rising from it leaves through the top vent without causing undue heating to the motherboard below.
Getting the case apart to fit the motherboard is a *little* tricky so I’ve documented it here. I must apologise for the quality of the pictures, I hadn’t intended to photograph the process and used the wrong camera settings.
Firstly, the plastic front panel which shrouds the USB ports and power/HDD LEDs must be removed. While the plastic isn’t unusually flimsy, you’ll want to take a bit of care during removal. Use only your fingers, do not attempt to force the panel off with tools.
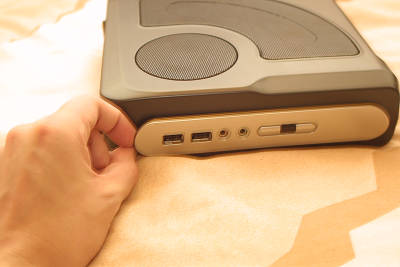
Lever gently at either end to release the clips.
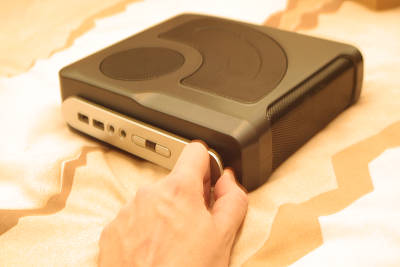
There is a third clip in between the two outer clips and adjacent to USB ports. This should come away when the nearest out clip is released.
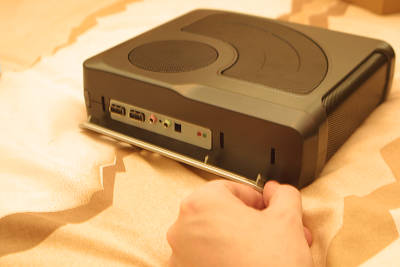
The correct side of the case must now be unscrewed. This is helpfully referred to as the ‘left’ side of the case in the Morex instructions which fail to give a reference of looking from the front or back. As it happens you can identify the correct side to remove by looking through the meshes and finding the side which has the 2.5″ HDD carrier plate nearest it.
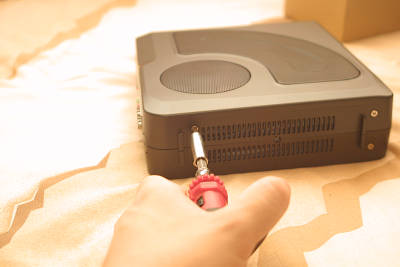
You only need to unscrew the two screws on this side. With the two screws out, you carefully pull the two sides apart from the bottom (screw end) of the case, the upper edges will then unclip from each other too.
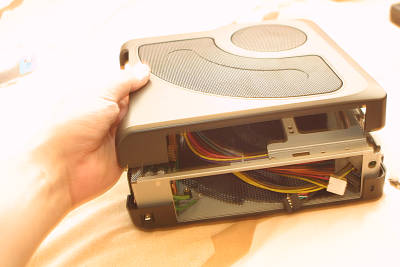
This should leave you with the case open and ready to accept your mini-itx board.
Now comes the really fun part. Getting the Mini-ITX motherboard installed inside the T3310 case.
As with any compact case, clearances are small so it’s fiddly, often frustrating work. Small fingers would be a bonus.
Before the motherboard can be installed, the 2.5″ Hard Disk mounting rail needs to be removed. This is done by removing three screws, one from the upper face at the back of the case, one from the bottom face and one from the front space. Somewhere in Taiwan, there is a system case designer who is undoubtedly laughing evilly at the trap he set for me. A trap which I dutifully walked straight into. Directly underneath the screw which fastens the hard disk rail to the front of the case is a hole which leads into an enclosed box section encompassing the USB ports. This hole is perfectly aligned with the screw and of exactly the right dimensions to readily accept the screw while making it incredibly hard to retrieve. I strongly recommend blocking this hole up with something until you have safely refitted the drive rail.
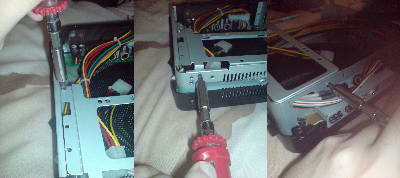
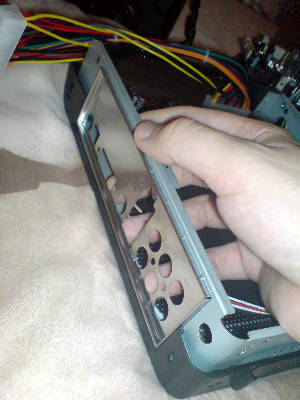
Next the port guard plate needs to be fitted to back of the case, This is like any ATX port guard and simply pushes into position from the inside of the case.
Next comes the motherboard itself. There are four fixing holes, one at each corner of the motherboard and they correspond to the four posts in the Morex case. Actually getting the holes to align with the post takes plenty of swearing, especially in the case of the EX1000 when you realise that anything you attempt to use for leverage will come off or bend (especially the heatsink!). I also located some of the ground straps provided in the case under the mounting holes before screwing in.
It may be helpful to pull the front-panel connection leads back through the front panel hole and out of the way while the motherboard is being installed.
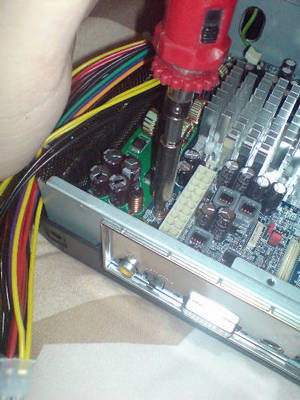
Once the motherboard is in, you should immediately check the port guard again to ensure that none of the free edges of the guard have entered the ports on the motherboard. In my case, one of them had gone into the network port and had to be bent back out of the way. Do this now or you will likely kick yourself silly when you realise you’re going to have to take the whole shebang apart once more.
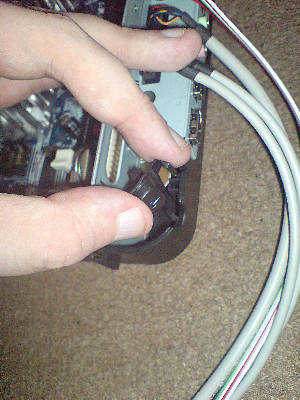
Reassembly is pretty much the straightforward reversal of the disassembly procedure. One ‘gotcha’ was that the power switch falls out of the case rather easily and is keyed to fit back into it’s slot as shown below:
I decided that rather than using a real 2.5″ drive, I wanted something silent. For this I elected to use a Sandisk Ultra-II Compact Flash card in a SATA CF adaptor. The SATA adapter board I bought was originally mounted to a PCI backplane which I removed. The adapter would not directly fit the 2.5″ drive mounts so I dutifully ‘bodged’ it with one screw. One thing to note here is that Morex provide you with a sheet of clear plastic with 4 holes. This is to be used as an insulator between the drive mounting rail and any drive you fit.
Squeezing the whole lot back together was a chore too as the hard drive mounting rail turned out to be direcly above the motherboard’s SATA ports. A little nervous force got me through 😉
All that remained was to install Mythbuntu.
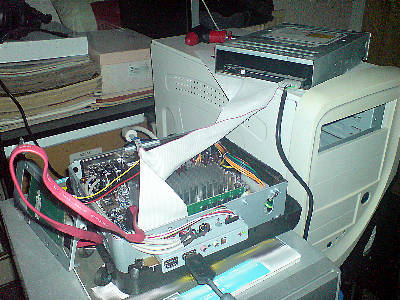
I discovered that the EX1000 would not talk to my USB CDROM drive so I temporarily used the IDE interface to boot the Live CD from a full size CDROM drive which I connected to an external PSU.
I don’t intend to discuss the entire process of installing Mythbuntu but I’ll drop a couple of pointers.
First of all, I used the normal ‘Desktop’ Mythbuntu disk. I selected the option to install a ‘frontend’ only as this means the mythtv server packages are excluded.
Secondly, I made a custom partition table with no swap partition and used a non-journaling Ext2 filesystem in the hope that it would reduce the write cycles on the compact flash card.
I also found that the software Xorg config tool would not let me change to using the openchrome driver. I remedied this by manually editing the xorg.conf file and changing “vesa” to “openchrome” in the “Driver” section.
Finally, I utilised the Via XVMC hardware rendering system to help performance during playback.
The end result is a system which performs well, boots quickly, takes up next to no space and most importantly is completely silent. I’d guess at the system drawing about 20 Watts under load but I will test this properly in future.
The case does get warm at the top but not worryingly so, even when under heavy load.

Thanks for this guide. It helped me a great deal with my installation with this case.
Hey there, I thought I would just point out that openchrome does not support hardware accelleration for the CX700M2 chipset (that the EX1000 utilises). I found this out the hard way.
Searching through /var/log/Xorg.log.0 will confirm this.
hello there, i just came across your site on bing, and i would like to comment that you express awesomely good on your site. i am very struck by the way that you write, and the subject is great. in any event, i would also like to acknowledge whether you would like to exchange links with my website? i will be to the great extent than happy to reciprocate and enter your link on in the link section. anticipating for your answer, thanks and have a great day!
i always prefer to use brushless cooling fans because they last longer and needs less maintennance*.’
hey buddy… i just wanted to say that my firefox is exploding when I click on the links… are you using some javascript or something?
There’s nothing special going on with outgoing links.
Is Firefox falling over for you? I can’t seem to reproduce any problem here.
our cooling fan uses a 7 blade design and it generates a great amount of air flow;,:
Zalman cooling fans are the stuff that i use on my pc, they are really built well .
That appears to be excellent however , i’m still not too certain that I prefer it. Regardless will look even more into it and decide personally! 🙂
I thought it was going to be lots of boring old post, but it really compensated for my time. I will certainly post a link to that page on my blog. I am sure my visitors can discover that incredibly valuable.